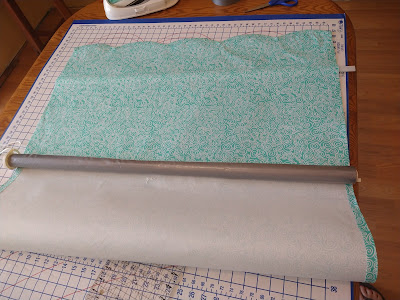
I have this kind of roller shade in each of my windows in the house--I have ordered the kit for the first ones I make but after that you can make them again but still use the hardware--a great deal! You begin by screwing the hardware into the window opening and cutting the roller to length. I make several small cuts until I get it the right length! Then you iron on the fusible interfacing to the wrong side of your fabric which has been cut to your roller bar width plus 3/4" on each side extra. I also allow 8" more than needed for the length to allow for squaring up and hems, etc.
After the main portion of the shade has been fused, you use this included roll of fusible web to roll over to the back and fuse down on each side.
I added some swoops to the hem and used a wide self-bias binding for the hem to add a bit of weight and also add the wooden slat for the same.
Now comes the highly technical bit of using duct tape to attach the top of the shade to the roller! It works great and holds well--remember the extra inches I added? This makes sure I don't have to unroll the shade all the way so the duct tape will never show.
The roller is added to the hardware and that's all there is to it! Instant window dressing 3 hours later!
Subscribe to:
Post Comments (Atom)
LEARNING ABOUT THINGS
This vine is growing through the 70-80' tall pines near Mary's home- and it is blooming all the way from the top to this part that h...

-
Oh, I love to see these throughout daughter' yard! The prednisone has been great to give me a boost; a boost so good that I haven...
-
The quilting was finished on this quilt and then I spent a lot of time making bindings yesterday. I hope to apply them for some finishes ...
-
I cut up all of the latest Fat Quarter Club fabrics paired with some of my own solids for these 9 patches. It was fun to dig through the sol...


This time, the worst part of the whole job (in my opinion) is already done — getting the hardware in and cutting to size, etc — so it’s a pleasant job and a great perk-up to the room! :)
ReplyDeleteClever and I love that fabric!
ReplyDeleteOh so pretty! I love it! Custom shades with perfect fabric.
ReplyDeleteBlessings,
Betsy
Lovely!
ReplyDeleteIt looks great!
ReplyDeleteNice job - an attractive and effective window covering!
ReplyDelete